![[Centos7] gitlab-runner 설치 및 연결](https://img1.daumcdn.net/thumb/R750x0/?scode=mtistory2&fname=https%3A%2F%2Fblog.kakaocdn.net%2Fdna%2FwZpRS%2Fbtrn7qoO144%2FAAAAAAAAAAAAAAAAAAAAALIMXv_lQrXoaExXDaMwSwGGVVgHChDE3VPwLw0GzIF9%2Fimg.png%3Fcredential%3DyqXZFxpELC7KVnFOS48ylbz2pIh7yKj8%26expires%3D1774969199%26allow_ip%3D%26allow_referer%3D%26signature%3DvthuOYWpZU%252F0TVIKqaSmBRS2rag%253D)
728x90
$ curl -L https://packages.gitlab.com/install/repositories/runner/gitlab-runner/script.rpm.sh | sudo bash
//repository setup
$ sudo yum -y install gitlab-runner
//install gitlab-runner
깃랩을 설치해주고..
$ sudo gitlab-runner registor연결을 해주기위해 레지스터 등록을 해준다.
Enter the GitLab instance URL (for example, https://gitlab.com/):

Enter the registration token:

Enter a description for the runner:

Enter tags for the runner (comma-separated):

Registering runner... succeeded                     runner=

Enter an executor: custom, docker, docker-ssh, shell, ssh,

kubernetes, parallels, virtualbox, docker+machine, docker-ssh+machine:

Runner registered successfully.
Feel free to start it,
but if it's running already the config should be automatically reloaded!
여러가지 입력하라고 하는데, 첫번째 URL과 token은 gitlab에서 확인 가능하다.

register가 정상적으로 등록이 되었다면,
옆에 연필모양을 누르고 잠금을 풀어줘야 사용이 가능하다.

참고로 여기서 녹색 연결표시가 아닌 느낌표 표시가 떳다면, 방화벽 때문에 접근이 불가능하거나
sudo로 register를 실행하지 않았기 때문이다.
sudo로 register를 실행했을시 config가 /etc/gitlab-runner/config.toml 에 생성되지만,
사용자 계정으로 실행한다면 ~/gltlab-runner/config.toml에 생성된다.
sudo로 다시하거나, cp로 옮겨주고 verify 옵션을 주어 실행하도록 하자.
stages:
  - build
  - deploy
스테이지 단계설정. 빌드하고 베포정도면 괜찮지않나..?

before_script:
  - 스크립트 실행하기전 명령

build to test:
  stage: build //빌드단계에서 실행하는 부분
  script:
    - ...
    - ...
    - ...
  after_script: //스크립트 끝나고
    - echo 'build success!'
  tags: // 해당 태그
    - test
  only: // 마스터만 실행가능
    - master
  when: manual // 수동동작

deploy to test:
  stage: deploy  //배포단계에서 실행하는 부분
  script:
    - ...
    - ...
  after_script:
    - echo 'deploy success!'
  tags:
    - test
  only:
    - master
  when: manual
요런식으로 gitlab.ci를 작성해서 프로젝트에 붙여넣어주면
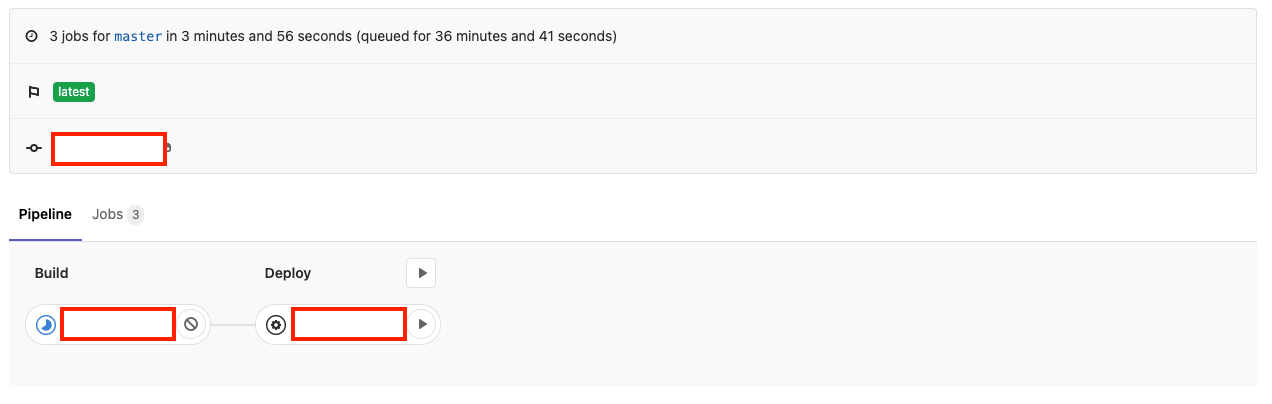
이런식으로 스태이지가 나뉘게되어 손쉽게 CI/CD를 구성할 수 있다!
728x90
'프로그래밍 공부 > Etc' 카테고리의 다른 글
| naver cloud platform - MSA (0) | 2022.07.19 |
|---|---|
| [osx/mac] wordpress local test (0) | 2022.03.07 |
| [Centos7 x86_64] Docker 다운로드 및 연결 (0) | 2021.12.16 |
| [Vault] KMS (0) | 2021.11.04 |
| audio tag에서 seekbar가 작동하지 않을때 (0) | 2021.09.17 |